Saturday, 15 June 2013

Day 40

As you can see it has been a while since my last chat so here is whats been done so far,
I got over to the engineers to chat about the bill, they came to the party and reduced the clutch and engine mount to less than I was expecting so the bill is bearable and a big thanks to them.
My work mate finished the frount motor mount today so I will bolt it in on monday and then I will post some pictures.

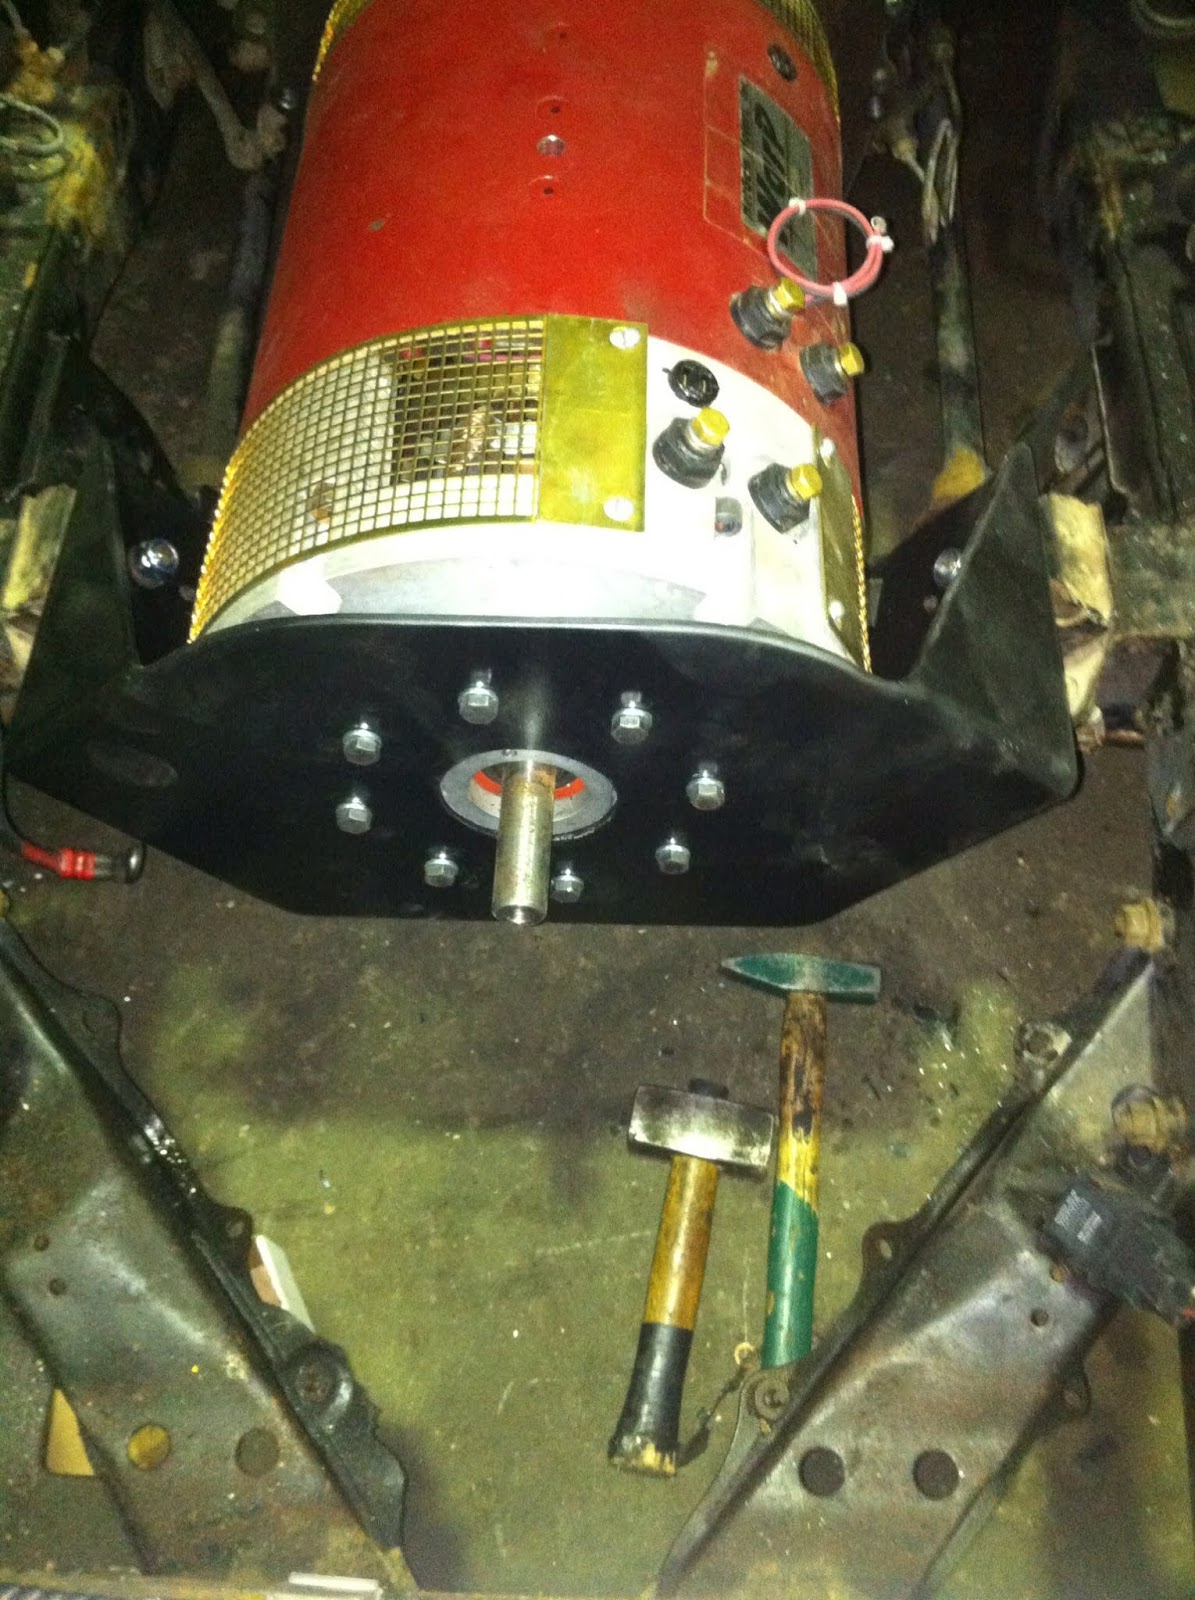
After a chat with my work mates I am putting in a shelf across the engine bay to mount the controller and vacuum pump and tank (as for the vacuum tank its an old fire extinguisher ) it was also mentioned that I should rubber mount it to allow the gards to move other wise they may crack.

After a bit of thinking I am going to cut a hole in the back of the battery box slightly bigger than the battery so I can put the last set in the box the whole will also there to let the main power cable out also.
I am looking into flexable sheath for the main cable as I am required to have the main high voltage in orange sheath and the price is the same( almost I have to buy 50 meters of flex for the same price as the solid and corners I may end up with 20 meters left over)

Tuesday, 4 June 2013

Day 29


I have got the motor and gear box adaptor made (a sore point at the moment as I have 30mm more than I should have if you notice there is a bearing in the middle of the flywheel mount I asked them to bush the centure of the motor sharft as it was made to take the gearbox sharft tip 

and a bill way to large I am cooling down before I talk to them 
my suggestion if you are going to get work done make sure you give it to them as a drawing and get a price before they start)


and I got the engineer to trim the flywheel they took the ring gear ( the starter motor uses it to turn the old motor) and some of the back to lighten it ( thats why its shiny ) got it balanced 
and then on saturday I put them together with the clutch then put it in now to make the front mount and controller mount


Saturday, 25 May 2013

Day 19

"The pump is ordered for cooling the controller, I will need to remove the heater core in the ute as it leaks. The plan so far is to pump the water/coolant though the air con radiator at the front of the ute though the controller to the heater core (inside the ute) and then back to the pump ( I may put a 100 watt water heater in the line for a bit more heat if needed )
(edit: I was told that I will need two pumps and circuits as the heater will need 80 c to warm the ute so that half will be done later )

Friday, 24 May 2013

Day 17

So far I got the welding done but I still have to sand and paint the chassis in places( the dirt was on the metal for a long time and that meant the dirt kept the moister on the metal giving the rust somewhere to start) I have made the decision to remove the power steering pump and later I will replace it with manual steering.

As for the vacuum for the brakes I will use the alternator/vacuum pump with a oil feed to the pump to keep it lubricated (as the oil goes out of the pump it will go into a container with a small amount of pressure to push it out to the pump again )and because I am connecting the belt to drive the alternator/vacuum pump I may as well use the alternator to charge the 12v battery.

The pump is ordered for cooling the controller, I will need to remove the heater core in the ute as it leaks. The plan so far is to pump the water/coolant though the air con radiator at the front of the ute though the controller to the heater core (inside the ute) and then back to the pump ( I may put a 100 watt water heater in the line for a bit more heat if needed )

I will put the controller in the ute this week and I will get the motor and gearbox back this week to so it will be a full on week
The rules say that I must be able to kill the power between the motor and the controller if any thing goes wrong so I have arranged for a emergency disconnect (not that I will use it because when the key is turned off the relays will kill the high voltage and then there is the foot on the clutch and take it out of gear) in the form of two Anderson 350 amp connectors with four 95mm2 cables (2 + and 2 -) all I need to do is find where to put the pull cord.
After a lot of thinking ( which will be my downfall )I am a little closer to how the batteries are to restrained I have always been going to strap them in groups but that's not the problem its when they are all in the tool box how do you hold them down without using steel ( and risk shorting out to the tool box) the answer is to put ply wood or thick plastic on top of the sets and then clamp that down with tie-down or something

Saturday, 18 May 2013

Day 10

Day off today
I am going to use this tool box for the batteries 8 rows of 6 batteries each set of 6 will be strapped together and then they all will be held down ( just how is a mystery as there is live wires in there so steel marginal ) I am going to put the wires out the back and as I need to have a disconnect for certification ( I need two splits to have 3 packs of 60v or less )I am going to use two Anderson connectors as seen on diy ev it will come off the battery thru the connector loop around back thru the connector onto the next battery so if I pull the loop it will kill the power as it pulls the connector apart.

Friday, 17 May 2013

Day 9

I took the fuel tank and lines off today,cleaned out the dirt in hard to reach places and did a really good steam clean so it look good now,I found a couple of rust holes to fix ( 30 min work) so I will do that on Monday.
this is a spanner with 800amps@3.2 volts
(from a youtube clip)

I am putting in 47x 3.2v=150 v
I must be very careful and NOT drop the spanner!


Day 8

I got the electric motor,gearbox,and (after a decision at work) the clutch with the flywheel to the engineers to get them put together.
I did little in the way of removing stuff today I still have the fuel tank and hose to take off,the grill will come off so I can get at the air con hoses ( I have been blessed with the entry and exit being at the top and bottom of the air con radiator so that will become part of the controllers water cooling system)
Tomorrow I will take my 12v vacuum pump to see if it works well in the ute, other wise I will need to use the utes belt driven vacuum pump more mounting and pulleys to drain the power of the motor.
as for power steering I may use one off a toyota prius or mr2 as they are electrically driven ( if not put a pully on a 12v motor and drive it and a vacuum pump together)